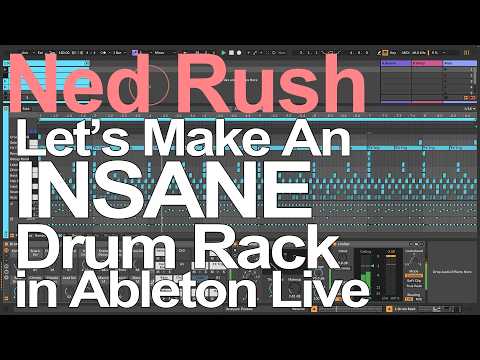
Ned Rush constructs a wildly overcomplicated drum rack in Ableton Live using Sampler, Expression Controls, Beat Repeat, and Follow Actions — then lets it run itself.
What happens when you build an Ableton drum rack with every tool at your disposal, wire it up so it makes most of the decisions, and then just watch? Ned Rush answers that question in this gloriously overcomplicated tutorial — a step-by-step walkthrough of a drum rack that multi-samples every element, randomises its own kit on every cycle, sequences probability and velocity variation, and routes everything through a chain of effects that switch in and out automatically.
What It Does
The rack loads multiple kicks, snares, hi-hats, bass samples, and chord layers into individual Sampler instances inside a single drum rack. An Expression Control set to random mode is mapped to the sample selector in each Sampler cell, so every time a dedicated MIDI note fires, the entire kit swaps out for a fresh combination of sounds. The result is a drum rack that never quite plays the same kit twice.
Beyond the drums, bass samples are loaded into Sampler with forward-backwards looping enabled, pitched up and run through a Chord MIDI effect and two Random MIDI devices to generate constantly shifting harmonic content. A lead layer adds Note Echo, portamento glide, and a further Expression Control randomising the echo time on every trigger. Probability and velocity variation are drawn directly into the MIDI clips, and Follow Actions cycle between clips automatically — so the arrangement itself keeps evolving without any manual intervention.
On the mix side, all drum chains are bused to a return chain inside the rack where Beat Repeat instances at different grid values are triggered at low probability, adding stutter and rhythmic displacement. MIDI-triggered effect switching via Envelope MIDI brings flanging, a vowel filter, Shifter, and Spectral Time in and out randomly. A Hybrid Reverb on the chord layer randomises its own algorithm, decay, and size each time it receives a note. Macro-mapped decay controls across all Sampler instances let the overall texture shift from tight and punchy to sprawling and ambient in real time.
How to Use It
- Load multiple samples into Sampler: Select all files for a given drum sound, drag them into a single Sampler instance, open the Zone Editor, set all root notes to C3, then right-click the Sample Selector and choose Distribute Ranges Equally.
- Map the Sample Selector to a macro: Assign each Sampler’s Sample Selector to its own numbered macro on the drum rack so selections remain independent across kick, snare, hat, bass, chord, and lead cells.
- Add an Expression Control set to random: Place an Expression Control device in a dedicated drum rack cell, set all outputs to Random and Remote, then map each output to the corresponding Sample Selector macro. A MIDI note in that cell triggers a full kit swap.
- Use the MIDI clip to schedule randomisation: Duplicate the main pattern clip and place a note on the Expression Control cell at the end of the loop so the kit refreshes on each pass.
- Apply macro-mapped envelope controls: Map the Decay and Release parameters of each Sampler to separate macros (kick decay, snare decay, hat decay, bass decay) for real-time tonal shaping. Set Sustain to zero and voice count to one for tight, monophonic drum behaviour.
- Build bass and chord layers with looping and random MIDI: Enable forward-backwards looping in the bass Sampler instances to extend one-shot samples naturally. Insert Random MIDI devices before and after the Chord effect with scale awareness and bidirectional mode to keep harmony moving without repetition.
- Set up lead randomisation: Place Note Echo, a Random device, an Expression Control mapped to the echo time, and a Note Length device in the lead cell chain. Enable portamento in Sampler for glide between notes.
- Draw probability and velocity into clips: Use the Chance editor in Ableton’s MIDI clip view to reduce note probability on kicks, snares, and bass notes to around 50%, then add velocity ramps for a more human feel.
- Bus drums to a return chain for Beat Repeat: Create a return chain inside the drum rack, route all drum cells to it, and add multiple Beat Repeat devices at different grid values with low chance settings for occasional stutter effects.
- Trigger effects with Envelope MIDI: Use Envelope MIDI devices to switch effect chains including flanger, vowel filter, Shifter, and Spectral Time in and out at random intervals driven by MIDI note data.
- Randomise reverb parameters on the chord layer: Map Hybrid Reverb’s algorithm, decay, and size to macros, then use an Expression Control triggered by chord notes to randomise those parameters on every hit.
- Enable Follow Actions between clips: Set clips to follow each other in sequence so the arrangement cycles automatically, and use a macro to randomise decay values across all Sampler instances for gradual timbral drift over time.
Why It Matters
This tutorial is not a template for a clean, repeatable workflow — and that is precisely the point. It demonstrates how far Ableton’s native tools can be pushed when combined with intention and a willingness to let the system take control. The techniques here, randomised multisampling via Expression Controls, MIDI-triggered effect switching, looped one-shots repurposed as harmonic material, probabilistic sequencing, and self-cycling arrangements, are each genuinely useful in isolation and can be extracted into more disciplined contexts. Watching Ned Rush build the whole thing in one session, mistakes and all, makes the logic of each connection legible in a way that polished tutorials often do not. By the end, the drum rack is doing the work. The producer’s job becomes listening and adjusting, which is a perfectly valid way to make music.