$0.00
| Controllers | Ableton Push THREE Controller, Ableton Push THREE Standalone, Ableton Push TWO |
|---|---|
| MaxforLive | Control Devices |
| Ableton Live Compatibility | Ableton Live 12 Standard with MaxforLive, Ableton Live 12 Suite |
| Min. Requirements | Ableton Live 12.2 with MaxforLive Installed |
| OS | Mac, Windows |

The more I worked with MaxforLive and the Push 3 Standalone the more I realised I wanted to build a massive performance template for it!
You can join in as I build OktoPush THREE in public by following the playlist produced in conjunction with Create Digital Music, the basic device will continue to be released for free and contain the theory behind the interactivity between the Push and Live. The concept being if you’re into programming yourself you can get hold of the code and build your own devices.
Not everyone wants to do that though so OktoPush THREE is the alternative, a premium performance template that we’ll be building over a period of time, increasing the price with each new release. We’ll be adding new features via MaxforLive devices and including performance effect racks courtesy of effects wizard PerforModule!
Our intent is to use MaxforLive to create 8 separate modes of control to the Push 3 that you can switch between by pressing SHIFT and one of the SCENE LAUNCH BUTTONS.
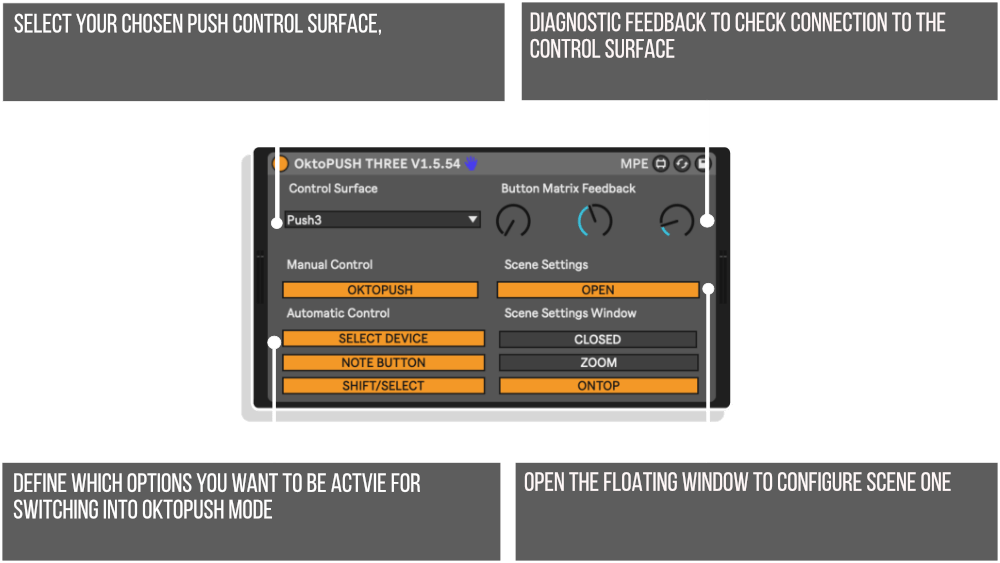
Switching into OktoPush mode can be done with a variety of methods:
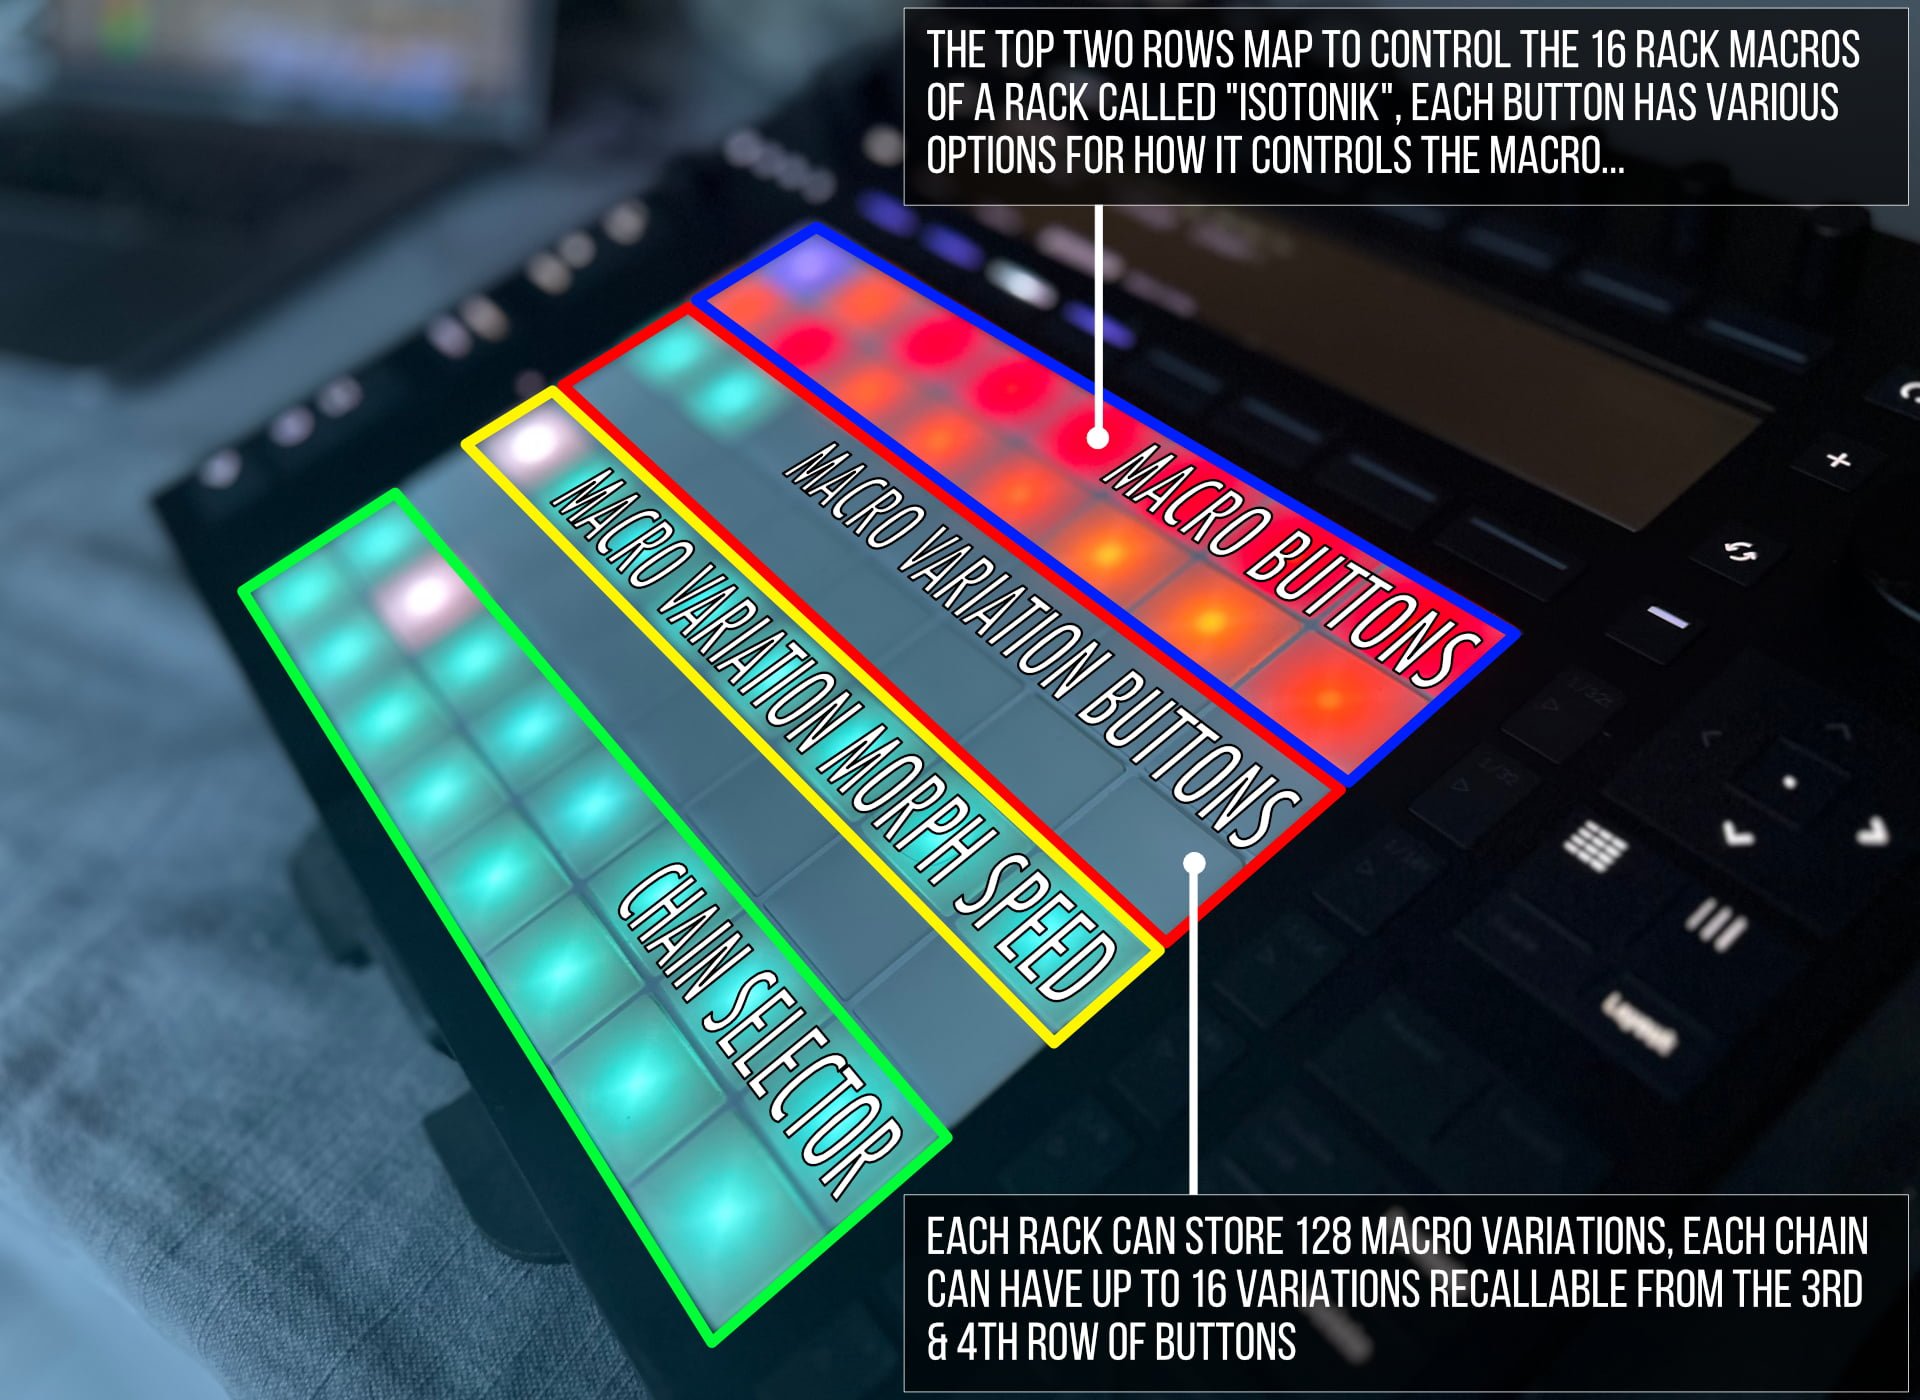
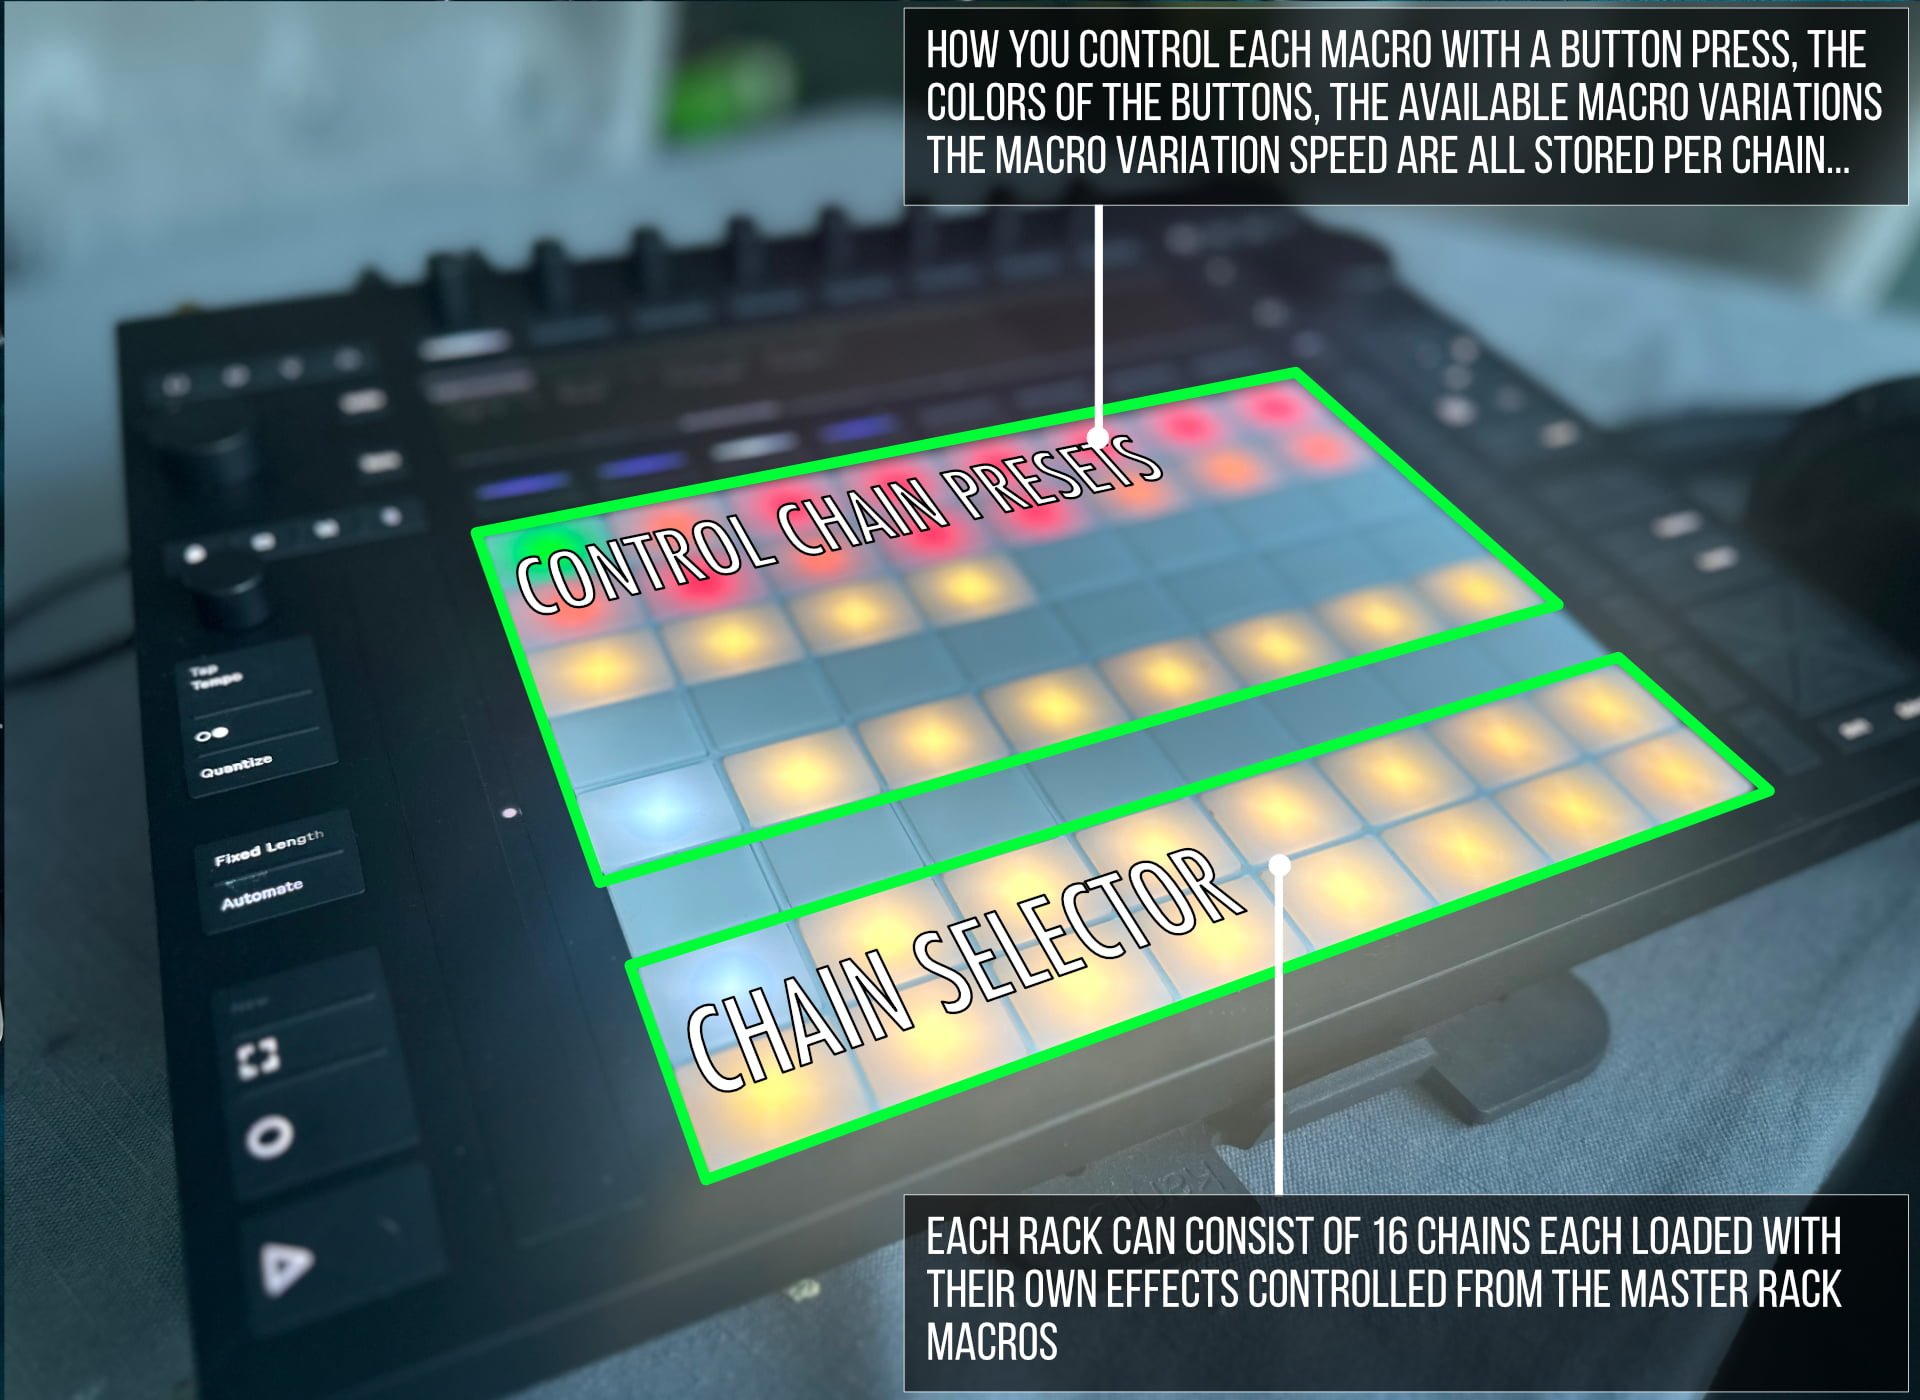
OKTOPUSH:MODE – ONE provides powerful, automatic control over an Isotonik Rack on the selected track. This mode is ideal for performance scenarios where you need to manipulate a variety of effects or parameters instantly using the Push 3’s button matrix.
Functionality
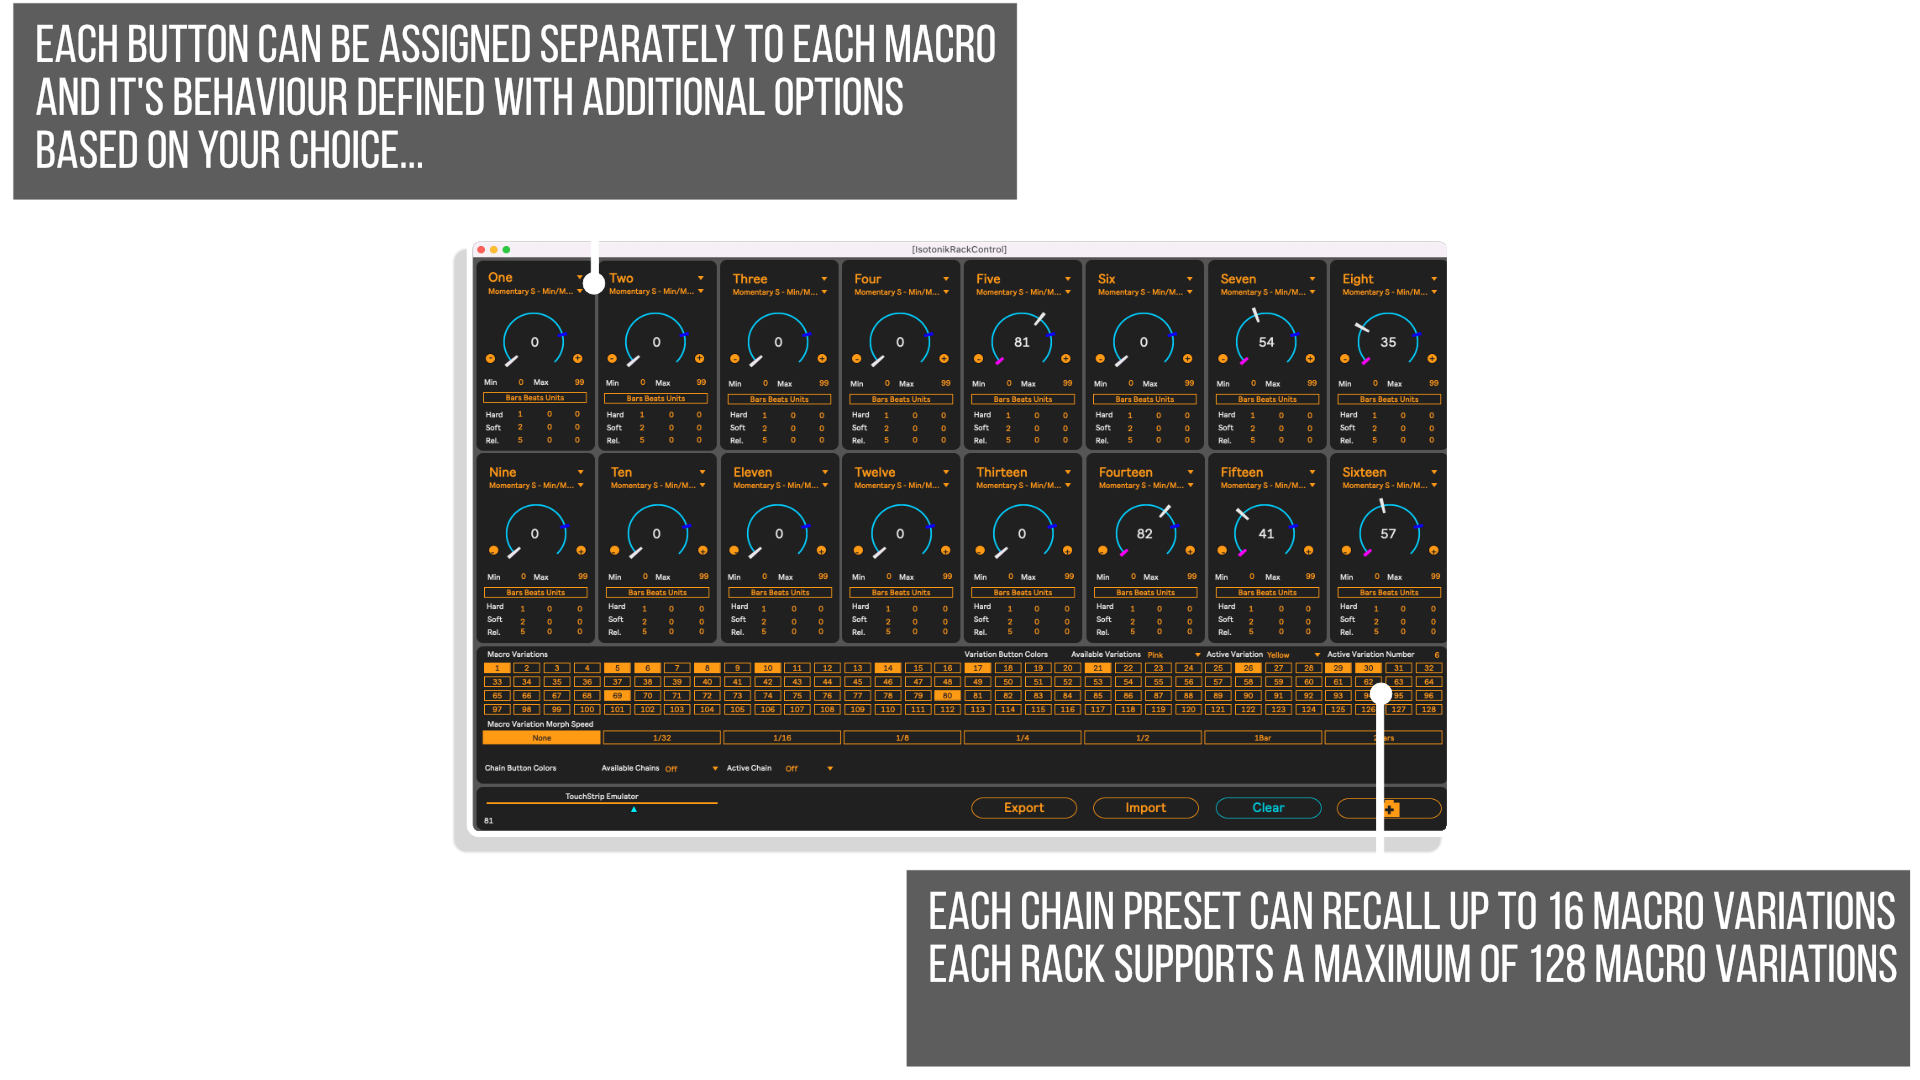
Control Layout
You can save a macro variation to be associated with multiple chains.
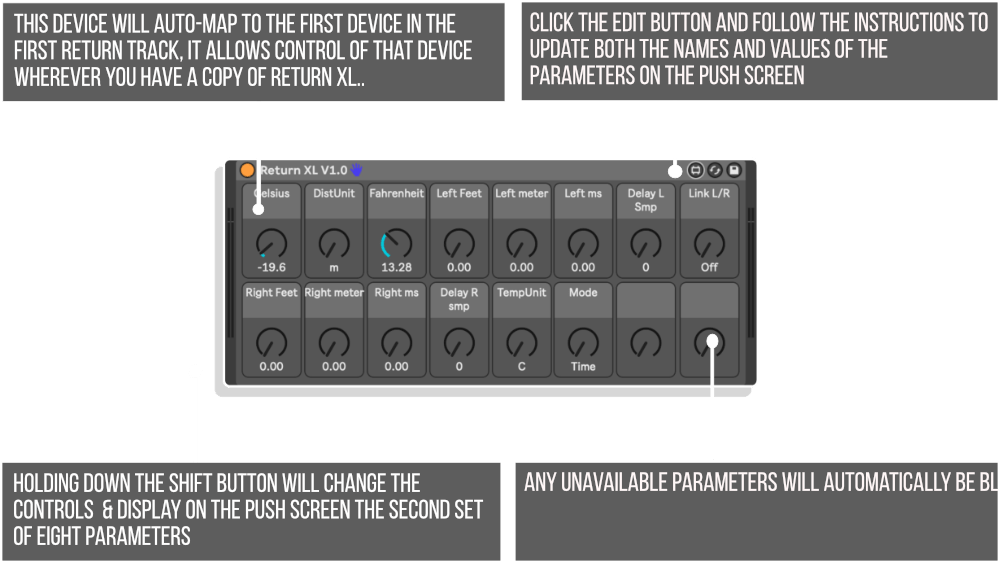
OKTOPUSH:MODE – TWO provides control over the send levels and return tracks in your Ableton Live set. This mode is perfect for quickly adjusting the amount of audio sent to your return tracks, ideal for performance scenarios where you want to control the depth of effects like reverb, delay, and more.
Functionality
Control Layout
Check the change log to see which features have been added to see the progress.
PLEASE NOTE: THIS TEMPLATE HAS BEEN TESTED TO WORK WITH THE PUSH 3 STANDALONE & CONTROLLER. WE HOPE TO EXTEND THE TESTING TO PUSH TWO FOR FUTURE RELEASES
MORE ISOTONIK STUDIOS PRODUCTS – CLICK HERE
For support as an existing customer please use the Support Request section within your account page, this will enable us to validate your purchase automatically and assign the request to the relevant developer to respond when they're available.
Reviews
There are no reviews yet.